Introduction
Mineral and fossil collecting blends outdoor exploration, hands-on science, and a bit of treasure hunting. Youâre not aiming for museum-quality specimens right away â itâs more about learning to see the ground differently and understanding what youâre looking at. Whether youâre drawn to the sparkle of a quartz crystal or the shape of an ancient shell pressed into stone, this guide is a practical starting point. Weâll cover the gear you actually need, where to look, how to stay legal and safe, and how to avoid common beginner mistakes. Letâs get into it.
Why Collect Minerals and Fossils?
People get into this hobby for different reasons. First, thereâs the science angle. You start recognizing rock types, understanding how crystals form, and seeing geology in action. Itâs a tangible way to learn earth science without sitting in a classroom. Then thereâs the outdoor aspect. Collecting gets you to places you might not otherwise explore â old mine dumps, riverbeds, road cuts, and mountain trails. It gives you a reason to be outside with a purpose. Thereâs also the potential for value, though keep expectations realistic. Most finds are common and worth pocket change, but you might stumble onto something nice enough to sell or trade at a local show. Finally, thereâs the satisfaction of building a collection that represents your own effort and knowledge. Thatâs the real reward.
Essential Gear for the Beginner Collector
You donât need a truckload of equipment to start, but a few key items will make your trips safer and more productive. Hereâs what Iâd recommend for a beginner spending under $150 total.
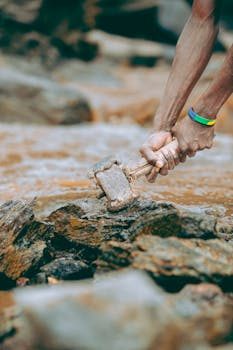
- Rock hammer. A proper geological hammer with a square striking face and a chisel end is essential. Skip the carpenterâs hammer â itâs not safe on rock. Look for one with a forged head and a comfortable, shock-absorbing handle. An Estwing is a solid choice thatâll last years. Beginners looking for a durable option can search for rock hammers to compare models.
- Chisel set. A couple of cold chisels in different sizes let you split rock more precisely than a hammer alone. Get ones with a hand guard or wear a glove on your chisel hand.
- Safety glasses. Rock chips fly without warning. Polycarbonate glasses are cheap and non-negotiable. Get a pair that wraps around or has side shields.
- Gloves. A decent pair of leather or heavy-duty work gloves protects your hands from sharp edges, rough rock, and accidental hammer strikes.
- Collecting bag or backpack. A sturdy canvas bag or small hiking pack works fine. You want something that can carry a few pounds of rock without ripping. Avoid anything flimsy.
- Field guide. A regional field guide to rocks, minerals, or fossils beats a smartphone app in areas with no service. Petersonâs and DK handbooks are reliable and affordable. If youâre not sure which guide to pick, browse field guides for options suited to your region.
- GPS or map. A smartphone with a downloaded map app works, but a simple handheld GPS or even a printed topo map is more reliable. Cell service is often terrible where good collecting happens.
- Carrying containers. Plastic tubs with lids, old pillowcases, or sturdy ziplock bags work for hauling finds. Newspaper or paper towels help cushion delicate specimens.
Skip the expensive rock saws and tumblers as a beginner. You wonât know what you actually need until youâve been out a few times. Focus on the basics first.
Where to Find Minerals and Fossils: Top Locations for Beginners
Knowing where to look is half the battle. As a beginner, your best options are places where the ground has already been disturbed or where collecting is actively encouraged. Hereâs a breakdown of the most accessible spots.
Pay-to-Dig Sites
These are privately owned quarries, mines, or claims where you pay a fee (usually $10-$40) for a day of collecting. Theyâre the easiest way to guarantee a decent find without worrying about legal issues. Many are set up specifically for families and beginners. You get access to fresh tailings or pre-sorted piles of material. Look for ones near you by searching âpay-to-dig mine [your state]â or âfee digging site [your region].â Theyâre ideal for a first trip.
Public Lands
National forests, Bureau of Land Management (BLM) land, and some state parks allow recreational collecting, but you need to check the rules first. In the U.S., you can often collect reasonable amounts of common minerals and rocks for personal use without a permit. Fossils are trickier â vertebrate fossils are generally off-limits, while common invertebrate fossils (like shells and corals) are usually okay. Always check with the local ranger station or BLM office before you go.
Road Cuts and Construction Sites
Fresh road cuts expose rock layers that might otherwise be buried. Construction sites for new subdivisions or highways can also yield interesting finds. Just be sure you have permission if itâs private property, and never enter an active construction zone without talking to the site manager first.
Beaches and Riverbeds
Coastal beaches often contain fossilized shark teeth, shells, and eroded minerals. Riverbeds are good for agates, jasper, and other water-worn stones. These locations are usually public, but check local regulations about removing materials.
Mine Tailings
Old mine dumps are excellent hunting grounds. But be cautious â old mines are dangerous, and the tailings themselves can have sharp edges and unstable slopes. Never enter an underground mine. Stick to the piles of waste rock outside.
Before you go anywhere, spend 20 minutes on Google Earth scanning for likely spots â old quarries, rocky hillsides, or outcrops near your area. Also, join a local gem and mineral club (more on that later) because members often share access to private collecting sites.
Understanding Laws, Permits, and Collecting Ethics
This is where new collectors get into trouble if they skip it. The rules vary a lot depending on where you live, but there are a few universal principles to follow.
Private land. Always get written permission from the landowner. Trespassing is the most common legal issue for collectors. Even if a field looks abandoned, someone owns it. A polite conversation with the owner often results in a yes.
Public land. National parks, monuments, and some state parks prohibit collecting entirely. On national forests and BLM land, you can usually collect reasonable amounts of common rocks and minerals for personal use without a permit. âReasonableâ generally means what fits in a backpack, not a pickup truck. For larger quantities or commercial collecting, you need a permit. Fossils are regulated differently â common invertebrate fossils are often okay, but vertebrate fossils (bones, teeth) are protected and require a permit.
Ethics. Even where itâs legal, collect responsibly. Donât dig enormous pits. Fill in holes you create. Donât take more than you can use or display. Leave the site as clean as you found it. This isnât just about being nice â it keeps collecting access open for everyone. If a site gets trashed, it gets closed.
Common Mistakes Beginners Make (And How to Avoid Them)
After a few trips, youâll notice patterns in what goes wrong. Here are the ones I see most often.
- Not preparing for weather. Collecting trips often involve walking through rough terrain in exposed conditions. A sunny forecast can turn into rain or extreme heat. Bring layers, plenty of water, and a rain jacket. Sunscreen and a hat are not optional.
- Bringing the wrong tools. A cheap rock hammer will break on your first real hit. A flimsy bag will rip. Invest in decent gear upfront, even if it means starting with a smaller kit. Youâll replace it anyway if you stick with the hobby.
- Failing to label finds. You will forget where you found a particular rock after three trips. Label everything immediately with the location, date, and basic rock type. A permanent marker and a small notebook or roll of masking tape works perfectly.
- Collecting everything. Beginners often fill their backpack with every interesting-looking rock within the first hour. Then theyâre exhausted and their bag is too heavy to carry. Be selective. Ask yourself: is this actually a good specimen, or does it just look shiny in the sunlight? Learning to be picky comes with practice.
- Ignoring safety. Collecting involves heavy tools, sharp rocks, loose slopes, and sometimes remote locations. Always tell someone where youâre going. Carry a first-aid kit. Wear sturdy boots, not sneakers. Donât collect alone if youâre brand new.
How to Identify Your Finds: A Beginner’s Toolkit
Identifying minerals and fossils is a skill that develops over time, but you can get started with a few simple tools and tests. Hereâs what you need for basic identification at home.
- Streak plate. This is an unglazed porcelain tile. Rubbing a mineral across it leaves a colored streak thatâs often more distinctive than the mineralâs outer color. Hematite, for example, leaves a red-brown streak, even if it looks black or metallic on the outside.
- Hardness test kit. The Mohs hardness scale ranks minerals from 1 (talc) to 10 (diamond). A simple test kit includes samples of known hardness (like a copper penny, a steel nail, and a piece of quartz) so you can scratch your unknown mineral against them and determine its hardness. This narrows down possibilities dramatically.
- Field guide or mineral identification book. A good regional field guide is indispensable. Look for one that uses clear photos, describes common minerals in your area, and explains how to use streak, hardness, and crystal shape for identification.
- Hand lens (loupe). A 10x hand lens lets you see small crystals, cleavage planes, and fossil details that are invisible to the naked eye.
- Smartphone apps. Apps like Rock Identifier or Mineral ID can help, but theyâre not always accurate for similar-looking minerals. Use them as a starting point, not a final answer.
A basic identification kit including a streak plate, hardness set, and hand lens can be bought for under $30. Itâs a worthwhile investment for any serious beginner. Browse mineral identification kits to get started.
Cleaning, Storing, and Displaying Your Collection
Once you bring your finds home, you need to clean them without damaging them. Most specimens should be cleaned with a soft brush and water. A toothbrush works perfectly. Avoid soap, vinegar, or other chemicals unless you know exactly what will react with your mineral â some minerals are water-soluble or easily etched.
For fossils, be more careful. Many fossils are softer than the surrounding rock. A gentle rinse under running water is usually safe, but avoid scrubbing. If you need to remove stubborn dirt, an air compressor or a can of compressed air can blow dust off without contact.
Storage is straightforward. Keep specimens in a cool, dry place out of direct sunlight. Sunlight can fade colors in some minerals and fossils. Use cardboard egg cartons, small plastic bins with dividers, or even old shoeboxes lined with paper towels. For delicate pieces, wrap them individually in acid-free tissue paper or place them in padded containers.
Display doesnât need to be fancy to start. Simple acrylic display cases, small wooden shelves, or even a repurposed bookshelf with specimen cups works well. Focus on keeping your collection organized and accessible so you can enjoy it. Check out acrylic display cases for an affordable option.
Joining the Community: Clubs, Shows, and Online Resources
This is probably the single most effective thing you can do as a beginner. Local gem and mineral clubs offer field trips, identification help, and access to private collecting sites that youâd never find on your own. Dues are usually under $30 a year. To find one, search âgem and mineral club [your city]â or check the American Federation of Mineralogical Societies website for a club directory.
Mineral shows are another great resource. Theyâre a mix of dealers selling specimens, club booths, and educational displays. You can see high-quality examples of minerals and fossils, ask questions, and buy starter pieces for just a few dollars. Most shows have a âjuniorâ or âbeginnerâ section with cheap specimens.
Online communities are also valuable. Mindat.org is the best free mineral database and has active forums. The subreddits r/rockhounds and r/fossilid are helpful for identification questions. Facebook groups for rockhounding in your region are often surprisingly active and full of local knowledge.
Budgeting for Your New Hobby: What to Spend and Where to Save
You can start mineral and fossil collecting with surprisingly little money. Hereâs a realistic beginner budget.
- Essential gear: Rock hammer ($25-$40), chisel set ($10-$15), safety glasses ($5-$10), gloves ($10-$15), bag ($15-$25), field guide ($15-$25). Total: $80-$130.
- First field trip: Pay-to-dig site fee ($10-$40). Gas and snacks ($15-$30).
- Club membership: $20-$30 annually.
- Identification kit: Streak plate and hand lens ($10-$20).
- Storage and display: Cardboard boxes and egg cartons are free. Add a small acrylic case ($10-$20) later.
Where should you save? Skip the premium rock hammer brands as a beginner â a $30 Estwing is just as good as a $60 specialty pick for your first year. Donât buy a rock tumbler or a lapidary saw yet. Save on display by using what you already have at home. Where should you spend? Safety gear and a good field guide are worth paying for. A cheap hammer that breaks on the trail is a waste of money.
Next Steps: From Beginner to Confident Collector
The best way to move from reading about collecting to actually doing it is to take one small step. Plan a trip to a pay-to-dig site in your area. Itâs the safest, most beginner-friendly introduction youâll find. Bring your basic gear, take your time, and donât worry about finding something perfect. Focus on learning the process â how to use your tools, how to look at the ground, and how to decide what to keep.
After that, join a local club. Attend a meeting. Go on a field trip with people whoâve been doing this longer than you. The learning curve accelerates fast once youâre around experienced collectors.
To help you get started, here are links to essential beginner gear and identification tools. These are the exact items Iâd recommend for your first few trips. Browse beginner rock collecting kits to see whatâs available.
And if youâre looking for a guided experience to kick things off, consider booking a trip at a pay-to-dig mine. A day with a guide and guaranteed finds is the best investment you can make as a new collector.