Introduction
Once you start collecting stamps beyond the pretty ones that come in the mail, you’ll wonder: is this one real? Or is it one of those reprints that looks almost identical but isn’t worth nearly as much? At that point, authentication stops being optional and becomes a core part of the hobby. Two of the most basic tools collectors use are watermarks and perforations. This stamp authentication guide will walk you through how they work, when to use each, and what mistakes to avoid. Whether you’re bidding at auction, sorting through a trade, or trying to figure out what you already own, knowing how to check a stamp’s watermark and perforations can save you from overpaying. We’ll cover what each technique is, how to use them properly, and which one matters more depending on what you’re looking at.
What Are Watermarks in Stamp Authentication?
A watermark is a design pressed into the paper when the stamp is made. It’s not printed on topâthe paper gets thinner in specific spots, creating a faint image you can see when light shines through. Think of it as a hidden mark baked into the paper itself. Common designs include crowns, numbers, letters, or national symbols. Whether a stamp has a particular watermark, or none at all, can tell you a lot about what you’re holding. To check, most collectors use a small tray and special watermark fluid. The fluid makes the paper temporarily see-through, revealing the design. A black plastic tray with a light underneath also works well, especially if you’d rather skip using fluid. Knowing which watermark (if any) a stamp should have is crucial. Some issues have no watermark, and that absence is a key detail. This method is most useful for older stampsâespecially from the 1800s and early 1900sâwhere different watermark variations mean big differences in value. If you’re just getting started, a stamp watermark tray and fluid kit is a practical way to learn.
Perforations: The Tooth of the Stamp
Perforations are the tiny holes punched between stamps so you can tear them apart. They’re measured by gaugeâhow many holes (or teeth) fit in two centimeters along the edge. A standard perforation gauge has a row of precisely spaced bars. You slide the stamp along until the holes line up with one of the patterns. That number is your measurement. Perforations aren’t random. They vary by country, time period, and even which printing machine was used. A US stamp from 1900 might have a gauge of 12, while a similar one from 1915 could be 6.5. Forgers often mess up the perforations, either using a different machine or cutting the stamps clean with no holes at all. It’s one of the quickest checks you can do. A gauge costs almost nothing, and the whole process takes about thirty seconds. It’s usually the first thing I check when I’m considering buying a stamp. If the gauge doesn’t match the catalog, I move on. A sturdy stamp perforation gauge is cheap and gives you an instant second opinion.
Watermarks vs Perforations: A Head-to-Head Comparison
Both methods are useful, but they work best in different situations. Here’s a direct comparison.
Ease of Use: Perforations win. You just need a gauge and steady hands. Watermarks take more practiceâyou have to learn how to use the fluid without harming the stamp, and interpreting what you see isn’t always straightforward. Wet watermarks can be tricky, especially on thin or heavily printed paper.
Reliability: Perforations are generally more consistent. A gauge measurement is what it is. Watermarks can be faint, hidden by heavy ink, missing on some printings of the same stamp, or confused with natural paper grain. You need good eyes and decent light.
Cost: Both are affordable. A basic perforation gauge is a couple of dollars. Watermark fluid costs more, but a bottle lasts a long time if you use it sparingly. A tray adds a bit more. Neither is a big expense.
Best Suited For: Watermarks are the go-to for older stamps, especially pre-1900 issues where the watermark defines the entire series. Perforations are your main tool for 20th-century stamps from many countries, especially when sorting different printings of the same design. If you mostly collect modern stamps (last 50-60 years), focus on perforations. You’ll rarely need watermarks. If your collection includes classic stamps, learn watermarks first.
Essential Tools for Watermark and Perforation Authentication
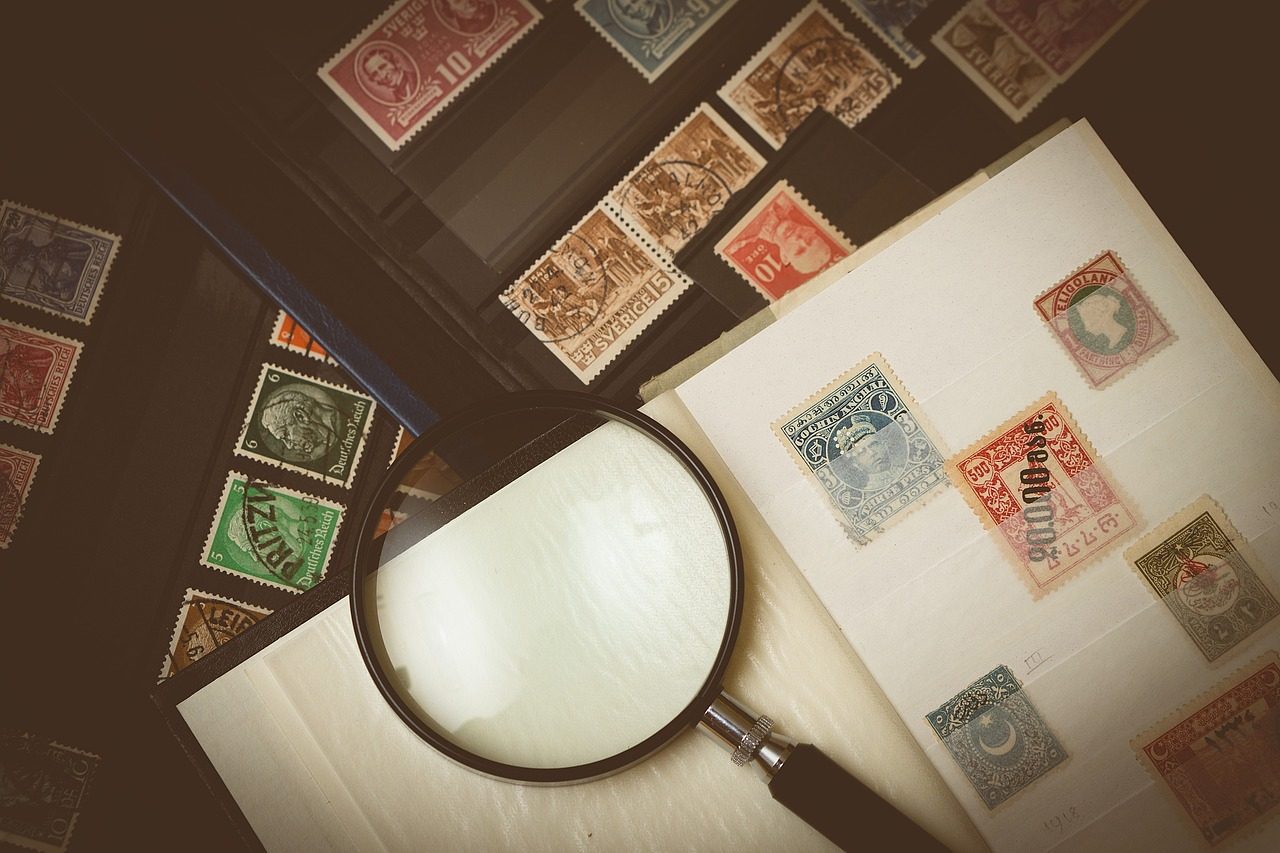
You don’t need a full lab setup. A few smart purchases will do. For watermarks, get a proper tray and some fluid. Brands like Lighthouse and SAFE are reliable. The tray is flat with a dark background that makes the watermark stand out. Fluid is necessaryâdon’t try using water. For perforations, a good gauge is non-negotiable. Stanley Gibbons gauges are the standard, but decent affordable versions exist. Some collectors use a digital caliper for extreme precision, but for most stamps, a manual gauge is fine. You’ll also want a good magnifier. A 10x or 15x loupe with a built-in light is invaluable for examining both watermarks (before fluid) and perforation teeth. Where to buy? Amazon has them, and so do specialty stamp shops. Expect to spend about $20-30 for a solid starter kit. Think of these tools as an investment that protects your collection. Spending $15 on a gauge is cheaper than buying one fake stamp.
Common Mistakes When Checking Watermarks
Using too much fluid: More isn’t better. A few drops are usually enough. Too much can bleed onto hinges or other stamps in the album. Use just enough to saturate the area you’re checking.
Misreading faint watermarks: This is the biggest trap. A light watermark can look like random paper texture. Compare it to a known example when possible. Practice on cheap stamps first. Some paper types don’t show watermarks well either. If you’re unsure, check again under different light.
Confusing watermark with paper grain: Paper grain runs in one direction. A watermark is a shaped design. Learn to tell the differenceâlook for a defined edge or a repeated pattern. Grain is more uniform and straight.
Skipping the backlight check: Before using fluid, hold the stamp up to a bright light. A strong watermark will often show up this way, especially on thin paper. This can save you from using fluid at all. Even experienced collectors sometimes forget this simple first step.
Common Mistakes When Measuring Perforations
Measuring on damaged or misaligned perforations: If a stamp has a torn corner or a row of compressed holes, that measurement will be off. Always check the best-preserved edge. If the stamp is damaged, measure multiple points and take an average.
Not taking an average gauge: Don’t assume one measurement defines the whole stamp. Measure three or four different edges if possible. Perforations can vary slightly on the same sheet. Take an average of at least three measurements for a reliable result.
Confusing perforations with rouletting: Rouletting uses short slits instead of punched holes. It looks very different under magnification. If your gauge doesn’t match any standard pattern, check if the stamp uses rouletting.
Using a low-quality gauge that shifts: Some cheap gauges aren’t printed accurately and can slide around. Invest in a reliable brand, or at least test your gauge against a stamp you already know the measurement of.
Dirt on the gauge: A dirty gauge with residue or debris can shift the stamp’s position. Keep yours clean with a soft cloth. It’s a small thing, but it matters.
When Watermarks Alone Can Authenticate a Stamp
Watermarks are definitive in some situations. The classic example is a series issued with a specific watermark and only that watermark. If you have a stamp from that series without the correct watermark, it’s either a reprint, a forgery, or a different printing. For instance, the US Washington Franklins series from the early 1900s had many watermark varieties. A specific gauge or watermark combination defines a high-value variety versus a common one. Early British issues also had distinct watermarks like Crown, Anchor, or Emblems. If your stamp lacks the expected watermark, you know something is wrong. But watermarks are less useful for very common stamps where forgeries exist. If a forgery uses the same watermark paper, only other tests (like perforations or plate flaws) will catch it. The rule: trust a watermark when the catalog explicitly identifies it as a distinguishing feature.
When Perforations Are the Deciding Factor
Perforations are often the fastest way to sort identical-looking stamps from different printings. Think about the many Queen Elizabeth definitives issued over decades. The design stayed the same, but the perforation gauge changed multiple times. A stamp from the 1950s might measure 15 x 14, while a 1970s version is 14 x 15. The difference is subtle but real. A quick check with a gauge separates them instantly. Perforations also spot reprints made from different plates or machines. If a reprint uses a machine with a slightly different gauge, you can detect it in about thirty seconds. Even new collectors can learn this quickly. It’s one of the most empowering authentication methods because it gives immediate, repeatable results. If you have a run of identical stamps and want to know which printing each is from, the perforation gauge is your first tool.
How to Check Both Watermark and Perforation on a Single Stamp
I use a specific workflow to avoid wasting time or damaging a stamp. Start with a visual inspection under good light. Look for anything obviousâa clean cut edge (suggesting a repair or forgery) or odd paper texture. Step one: measure the perforations. This is quick and non-destructive. Place the stamp on your gauge and find the matching pattern. Write down the gauge. If it matches the catalog, proceed. If it doesn’t, the stamp likely isn’t what you think. Step two: check for a watermark. First, try the backlight method. Hold the stamp up to a strong lamp or window. If you see a faint pattern, compare it to known watermarks. If not, use a small amount of watermark fluid in your tray. Place the stamp face down in the fluid. The watermark should become clear in a few seconds. Remove the stamp and dry it gently. Total time: about two to three minutes for a full check. This workflow minimizes handling and ensures you don’t use fluid unnecessarily on a genuine stamp.
Best Practices for Building Your Authentication Kit
Start with four essential tools. A good perforation gauge is number one. Get one from Stanley Gibbons or a similar brand. Second, a watermark tray and bottle of fluid. Lighthouse and SAFE both offer affordable kits. Third, a quality magnifier. I recommend a 10x or 15x loupe with a built-in LED light. Fourth, a reliable catalog. The Stanley Gibbons catalogs for your region are the gold standard, but even an app like StampWorld or Colnect can help as a cross-reference. As you progress, consider adding a UV lamp. Some paper types and watermarks fluoresce differently under UV light. It’s an advanced tool but useful for specific issues. A digital caliper for extreme perforation precision is an option for serious specialists, but most collectors won’t need one. The progression: start with the gauge and lens. Add the watermark kit when you begin buying older stamps. Add the lamp when you encounter specific authentication challenges. Don’t buy everything at once. Build your kit as your collection grows and your needs become clearer.
Final Tips for Reliable Stamp Authentication
Make authentication a habit, not a chore. Start with perforations for modern stampsâthey’re fast and objective. Use watermarks for classics. Always use proper tools. A cheap gauge or a dirty lens will lead to mistakes. Cross-reference every result with a catalog. Don’t rely on memory. And most importantly, compare your stamp with known genuine examples when you can. Join a local stamp club or an online forum where you can verify your findings with experienced collectors. The more you practice, the faster you’ll develop an instinct for what looks right. A stamp that feels wrong usually is. Trust that feeling after you’ve done the groundwork. The goal isn’t paranoiaâit’s confidence. Every time you correctly authenticate a stamp, you add real value to your collection and avoid having to buy a replacement later.