How to Clean Vintage Collectibles Safely Without Destroying Their Value
If you collect anything old, you know the feeling. You reach for a modern spray cleaner, then stop. One wrong wipe can strip a patina that took decades to form. But letting dust and grime pile up isn’t ideal either. The trick is figuring out how to clean vintage collectibles safely so you keep both the look and the resale value. This guide covers the tools, the methods, and the common mistakes that can turn a nice piece into a regret. Whether it’s glass, metal, ceramics, wood, or textiles, the same idea applies: go slow, be gentle, and know when to stop.
Why Cleaning Vintage Collectibles Requires Extra Caution
Modern cleaning products are made for modern finishes. They have strong surfactants, abrasives, and chemicals that can permanently change a vintage item’s surface. A 1940s ceramic figurine might have hand-painted details that weren’t sealed like today’s glazes. A piece of vintage brass might have deliberate tarnish that gives it character. Spraying those with an all-purpose cleaner is like sanding off the history.
The biggest risk is damage to patina. That greenish layer on bronze? Collectors pay extra for it. The worn paint on an old tin toy? That’s part of its story. Aggressive cleaning removes those features and often kills the item’s resale value entirely. Beyond that, many vintage items have unstable materials â old plastics can craze, wood veneers can lift, and textiles can yellow or shrink if they get too wet or hot.
Another thing to keep in mind is that you often don’t know what’s been applied to an item over the years. Previous owners might have used wax, polish, or even glue. Adding a chemical cleaner on top of unknown residues can create a reaction that ruins the finish. That’s why cautious, controlled methods are non-negotiable. The safe approach always starts with assuming the item is more fragile than it looks.
Essential Tools and Supplies You Should Have on Hand
You don’t need a big fancy kit. A few basic supplies will cover most cleaning jobs, as long as you use them right. Here’s what I keep in my own cleaning kit, and why each item matters.
- Microfiber cloths. These are non-abrasive and trap dust instead of pushing it around. Avoid paper towels or old t-shirts â both can scratch delicate surfaces. If you’re starting out, look for a pack of high-quality, lint-free microfiber cloths for delicate cleaning and wash them separately without fabric softener.
- Distilled water. Tap water has minerals that can leave spots or residues, especially on glass and metal. Distilled water is pure and safe for even porous surfaces. It’s cheap and prevents a lot of headaches.
- Mild dish soap. Something gentle like a basic castile soap or a simple dish liquid without dyes or fragrances works best. This is your go-to for cleaning grime without harsh chemicals. Just a few drops mixed into distilled water.
- Soft-bristled brushes. A small brush set (often sold as makeup or detail brushes) is great for reaching into crevices without scratching. Use them dry for dusting or slightly damp for stubborn dirt.
- Cotton swabs and sponges. Swabs are perfect for tight corners, painted details, and around hardware. For larger surfaces, use a soft cellulose sponge â never a scrub sponge with an abrasive side.
- Compressed air. A can of compressed air is handy for blowing dust out of cracks, crevices, and delicate mechanical parts. It’s non-contact, so there’s no risk of scratching or moisture damage. Just keep the can upright and avoid shaking it.
These items are inexpensive and easy to find. A quick search for “microfiber cloths for delicate cleaning” or “soft detail brush set” on Amazon will give you plenty of options. I’d recommend buying a small kit of these essentials before you start any project â it prevents you from grabbing whatever is under the sink and risking damage.
A Step-by-Step Process to Clean Vintage Collectibles Safely
Before you touch any liquid, follow this sequence. It minimizes risk and keeps you from rushing into something you can’t reverse.
Step 1: Dust first. Use a dry microfiber cloth or a soft brush to remove loose dirt. This is the most important step because wetting dust can turn it into mud that grinds into the surface. Take your time and work from top to bottom.
Step 2: Test in an inconspicuous area. Choose a spot that’s not visible, like underneath a base or inside a rim. Apply your cleaning solution with a cotton swab and gently wipe. Wait a few minutes to see if the color changes, if the surface lifts, or if any residue appears. If it does, stop immediately and choose a milder method.
Step 3: Use minimal moisture. Dampen your cloth or swab, then wring it out until it’s barely moist. You want to avoid puddling or soaking. Vintage items were often assembled with animal glues or water-soluble paints, and too much moisture can dissolve those bonds.
Step 4: Wipe gently in one direction. Don’t scrub in circles or apply pressure. Let the cloth and the mild solution do the work. For built-up grime, let the damp cloth sit on the spot for a few seconds to soften the dirt, then wipe away.
Step 5: Air dry completely. Place the item in a well-ventilated area away from direct sunlight or heat sources. Sunlight can fade colors, and heat can cause warping. Never use a hair dryer or an oven to speed up drying â that’s a recipe for cracked finishes and split wood.
Step 6: Inspect and repeat only if needed. If the item still looks dirty after drying, you can repeat the process. But if it looks clean but dull, that might be the natural state of the patina. Don’t keep cleaning just to get a “like new” shine, especially on metal or painted surfaces.
The whole process should feel deliberate, not rushed. I’ve cleaned hundreds of items, and the ones that gave me trouble were always the ones where I skipped a step or got impatient.
How to Clean Different Materials: Glass, Ceramics, Metal, Wood, and Textiles
Different materials need different rules. Here’s a breakdown of what works and what doesn’t for the most common collectible surfaces.
Glass
Vintage glass, especially Depression glass or hand-blown pieces, can be surprisingly sensitive. Use only distilled water and a drop of mild dish soap. Avoid abrasives, scouring pads, and any cleaner labeled “anti-streak” or “ammonia-based.” Dry with a soft microfiber cloth to prevent water spots. Never soak a glass piece that has paint or gold detailing â that decoration can lift right off.
Ceramics
Most glazed ceramics can handle a gentle wipe with a damp cloth, but avoid soaking them in water. The body of the ceramic can absorb moisture, leading to cracks or crazing over time. For unglazed terracotta or bisque, use only a dry brush â those surfaces are porous and will suck up any liquid. For stubborn dirt, use a barely dampened swab and dry immediately.
Metal
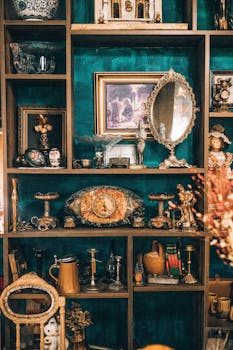
This is where collectors make the biggest mistakes. Many people think metal should be shiny, but tarnish is often desirable, especially on brass, copper, and silver. If you must clean metal, use a product specifically made for that metal type. For brass, a little isopropyl alcohol on a soft cloth can cut grease without stripping patina. Avoid commercial metal polishes that contain harsh abrasives or acids. Never use vinegar or lemon juice â they etch the surface permanently.
Wood
Water is the enemy of vintage wood. It can lift veneer, cause warping, and damage the original finish. Use a dry or slightly damp cloth, and work quickly. If the wood has a wax finish, you can apply a high-quality furniture wax sparingly, but only after checking a care guide for that specific piece. Never use spray polishes â they contain silicones that build up and dull the surface over time.
Textiles
Vintage clothing, linens, and lace are among the most fragile collectibles. The safest method is gentle vacuuming through a mesh screen using a low-suction setting. This lifts dust without pulling fibers. For stains or odors, professional conservation cleaning is often the better choice. Homemade stain removers and soaking are high-risk because vintage fabrics may have degraded dyes or weakened fibers that can’t handle even mild agitation. If you must hand wash, use cold distilled water and a drop of mild detergent, and never wring or twist.
Common Mistakes That Can Ruin a Vintage Collectible
You’d be surprised how many valuable items have been destroyed by well-meaning owners with a spray bottle. Here are the most common errors I see.
- Using bleach â even diluted. Bleach is a strong oxidizer that breaks down organic materials like fibers, paints, and paper. One encounter with bleach and a vintage textile can cause it to disintegrate over time.
- Scrubbing aggressively. Pressure and friction are the fastest way to remove patina, scratch glass, and damage finishes. Always use gentle, repeated passes instead of force.
- Submerging items. Soaking a collectible in water or cleaning solution is almost always a mistake. It forces moisture into joints, cores, and beneath finishes where it can cause unseen damage.
- Using vinegar or baking soda. These are common DIY cleaning “hacks,” but they are acidic or abrasive and can etch metal, dull glass, and strip paint. They’re more likely to harm than help.
- Overlooking patina. Patina isn’t dirt â it’s a chemical change on the surface that actually protects the material and gives it vintage appeal. If you remove it, you might expose bare, reactive metal that will never look the same.
- Rushing the dusting step. Dirt acts like sandpaper. If you apply moisture before removing dust, you’re essentially creating a gritty paste that abrades the surface.
Avoid these, and you’ll save yourself a lot of heartache â and a lot of money.
When Not to Clean a Vintage Collectible at All
Believe it or not, there are times when the best thing you can do is close the cabinet and walk away. Not every piece needs cleaning, and some items are better left untouched.
Museum-quality items, especially those with original finishes or provenance, should almost never be cleaned by an amateur. If you have a piece that you suspect is high-value, get a professional opinion first. Original paint, decals, labels, and signatures can be incredibly fragile. Even a gentle wipe can remove them.
Patina on metal items like candlesticks, tools, or antique firearms is often part of the value. Collectors buy these pieces specifically for the aged look. If you polish them to a mirror shine, you could turn a valuable collectible into a common decorative item worth a fraction of the price.
Also, consider whether the dirt is actually part of the historical record. A piece of pottery with remnants of its original use, a wooden chest with its untouched finish, or a signed book with its patina intact tells a story. Cleaning it erases that story. If the item isn’t actively deteriorating or causing health concerns, sometimes the wisest choice is to leave it alone and simply enjoy it as it is.
Safe Cleaning Products vs. Products to Avoid
Here’s a quick reference for what belongs in your cleaning kit and what should stay in the utility closet.
Safe to use:
- Distilled water
- Mild dish soap (like Dr. Bronner’s or Seventh Generation)
- Isopropyl alcohol (for some metals, and only in small amounts)
- Compressed air (for dust in crevices)
- High-quality microfiber cloths
- Soft-bristle detail brushes
- Acid-free tissue paper (for storage, not cleaning)
Avoid at all costs:
- Bleach and ammonia-based products
- Multipurpose spray cleaners (like Formula 409 or Simple Green)
- Glass cleaners with ammonia (like Windex)
- Vinegar and lemon juice
- Baking soda and other abrasives
- Steel wool or scouring pads
- “Magic Eraser” type melamine sponges (they are abrasive)
When in doubt, always reach for the milder option. You can always do a second pass, but you can’t undo damage. If you find yourself cleaning frequently, it’s worth keeping a small bottle of mild castile soap on hand for mixing a gentle cleaning solution. A mixture of one teaspoon of mild dish soap per quart of distilled water is about as gentle as it gets and works for most light cleaning.
How to Dry and Store Collectibles After Cleaning
Proper drying and storage are just as important as the cleaning itself. A clean item left to dry improperly can end up with water spots, mold, or warping.
Always air dry on a soft, clean towel in a room-temperature, shaded spot. Avoid placing items on newspaper or colored fabric, which can transfer ink or dye. For hollow pieces like vases or teapots, tilt them to allow air circulation inside â otherwise, moisture can get trapped and cause mold or musty smells.
Once dry, think about storage. Avoid basements and attics, where humidity and temperature swing wildly. Display cabinets with glass doors are ideal for keeping dust at bay. For storage, use acid-free tissue paper to wrap delicate items, and never use newspaper or plastic bags. Newspaper ink can transfer, and plastic traps moisture. Cardboard boxes should be acid-free as well, since standard cardboard becomes brittle and can off-gas acids over time.
If you’re displaying items, keep them out of direct sunlight. UV light fades colors and weakens textiles. A simple UV-filtering film on windows or a display case with UV glass goes a long way. For metal pieces, a thin coat of Renaissance Wax (a conservation-grade product) can help protect the surface, but test it on a small area first.
My Recommendation: A Minimalist Cleaning Kit for Beginners
If you’re just starting out and you want a ready-to-use cleaning kit, here’s exactly what I’d put together. This will cover most materials and most levels of dirt without breaking the bank.
- A pack of 12-by-12-inch microfiber cloths (lint-free)
- A small detail brush set (with both flat and angled heads)
- A bottle of distilled water
- A small bottle of mild castile soap
- A can of compressed air with a precision nozzle
- A box of cotton swabs (the round ones, not pointed)
- A package of acid-free tissue paper
That’s it. You can assemble this from a store like Amazon for under $30. I prefer to buy my microfiber cloths in bulk because you’ll go through them. The detail brushes are a must for anything with texture â pottery, jewelry, or carved wood. The compressed air is surprisingly useful for things like old radios, cameras, or any collectible with knobs and dials.
If you want to take it a step further, add a small spray bottle for your distilled water and soap mixture. Label it clearly so no one uses it for anything else. Keep everything in a small box or pouch, and you’ll have a dedicated collectible cleaning kit ready at all times.
Final Thoughts: Keep Your Collection Clean Without Compromising Value
Cleaning vintage collectibles safely is ultimately about discipline. It’s about resisting the urge to scrub, to soak, or to use a product that promises quick results. The items in your collection have survived decades, sometimes centuries, and they don’t need aggressive intervention â they need thoughtful care.
Go slow. Test first. Use gentle methods. And remember that sometimes the right choice is to walk away entirely. That’s not laziness; it’s experience talking. If you follow the steps outlined here, you’ll keep your collection looking great while preserving the very qualities that make it valuable in the first place. And if you need a starting point for building your own cleaning kit, the products linked throughout this article are the same ones I use and trust for my own pieces.